1 Create shift plan
Go to the shift plan under > Duty roster > Shifts.
Make the following settings in the blue filter
-
Warnings activated
-
Sorting - by start
-
Grouping - according to work areas
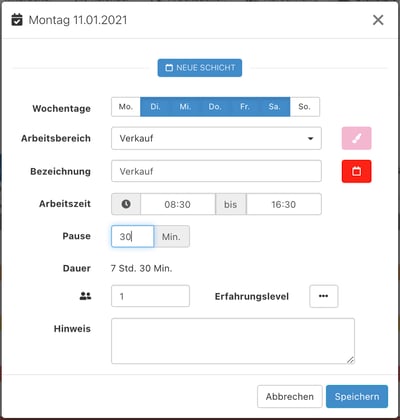
Use the blue plus to create all necessary shifts for the respective work areas.
2 Assign employees
Switch to the staff roster under > Roster > Staff.
Make the following settings in the blue filter:
-
Warnings activated
-
Availabilities activated
-
Absences activated
-
Planned figures: Pop Up
Now you plan your staff day by day.
Select a day by clicking on the date. Now the shifts of the day that are still open appear in the right column.
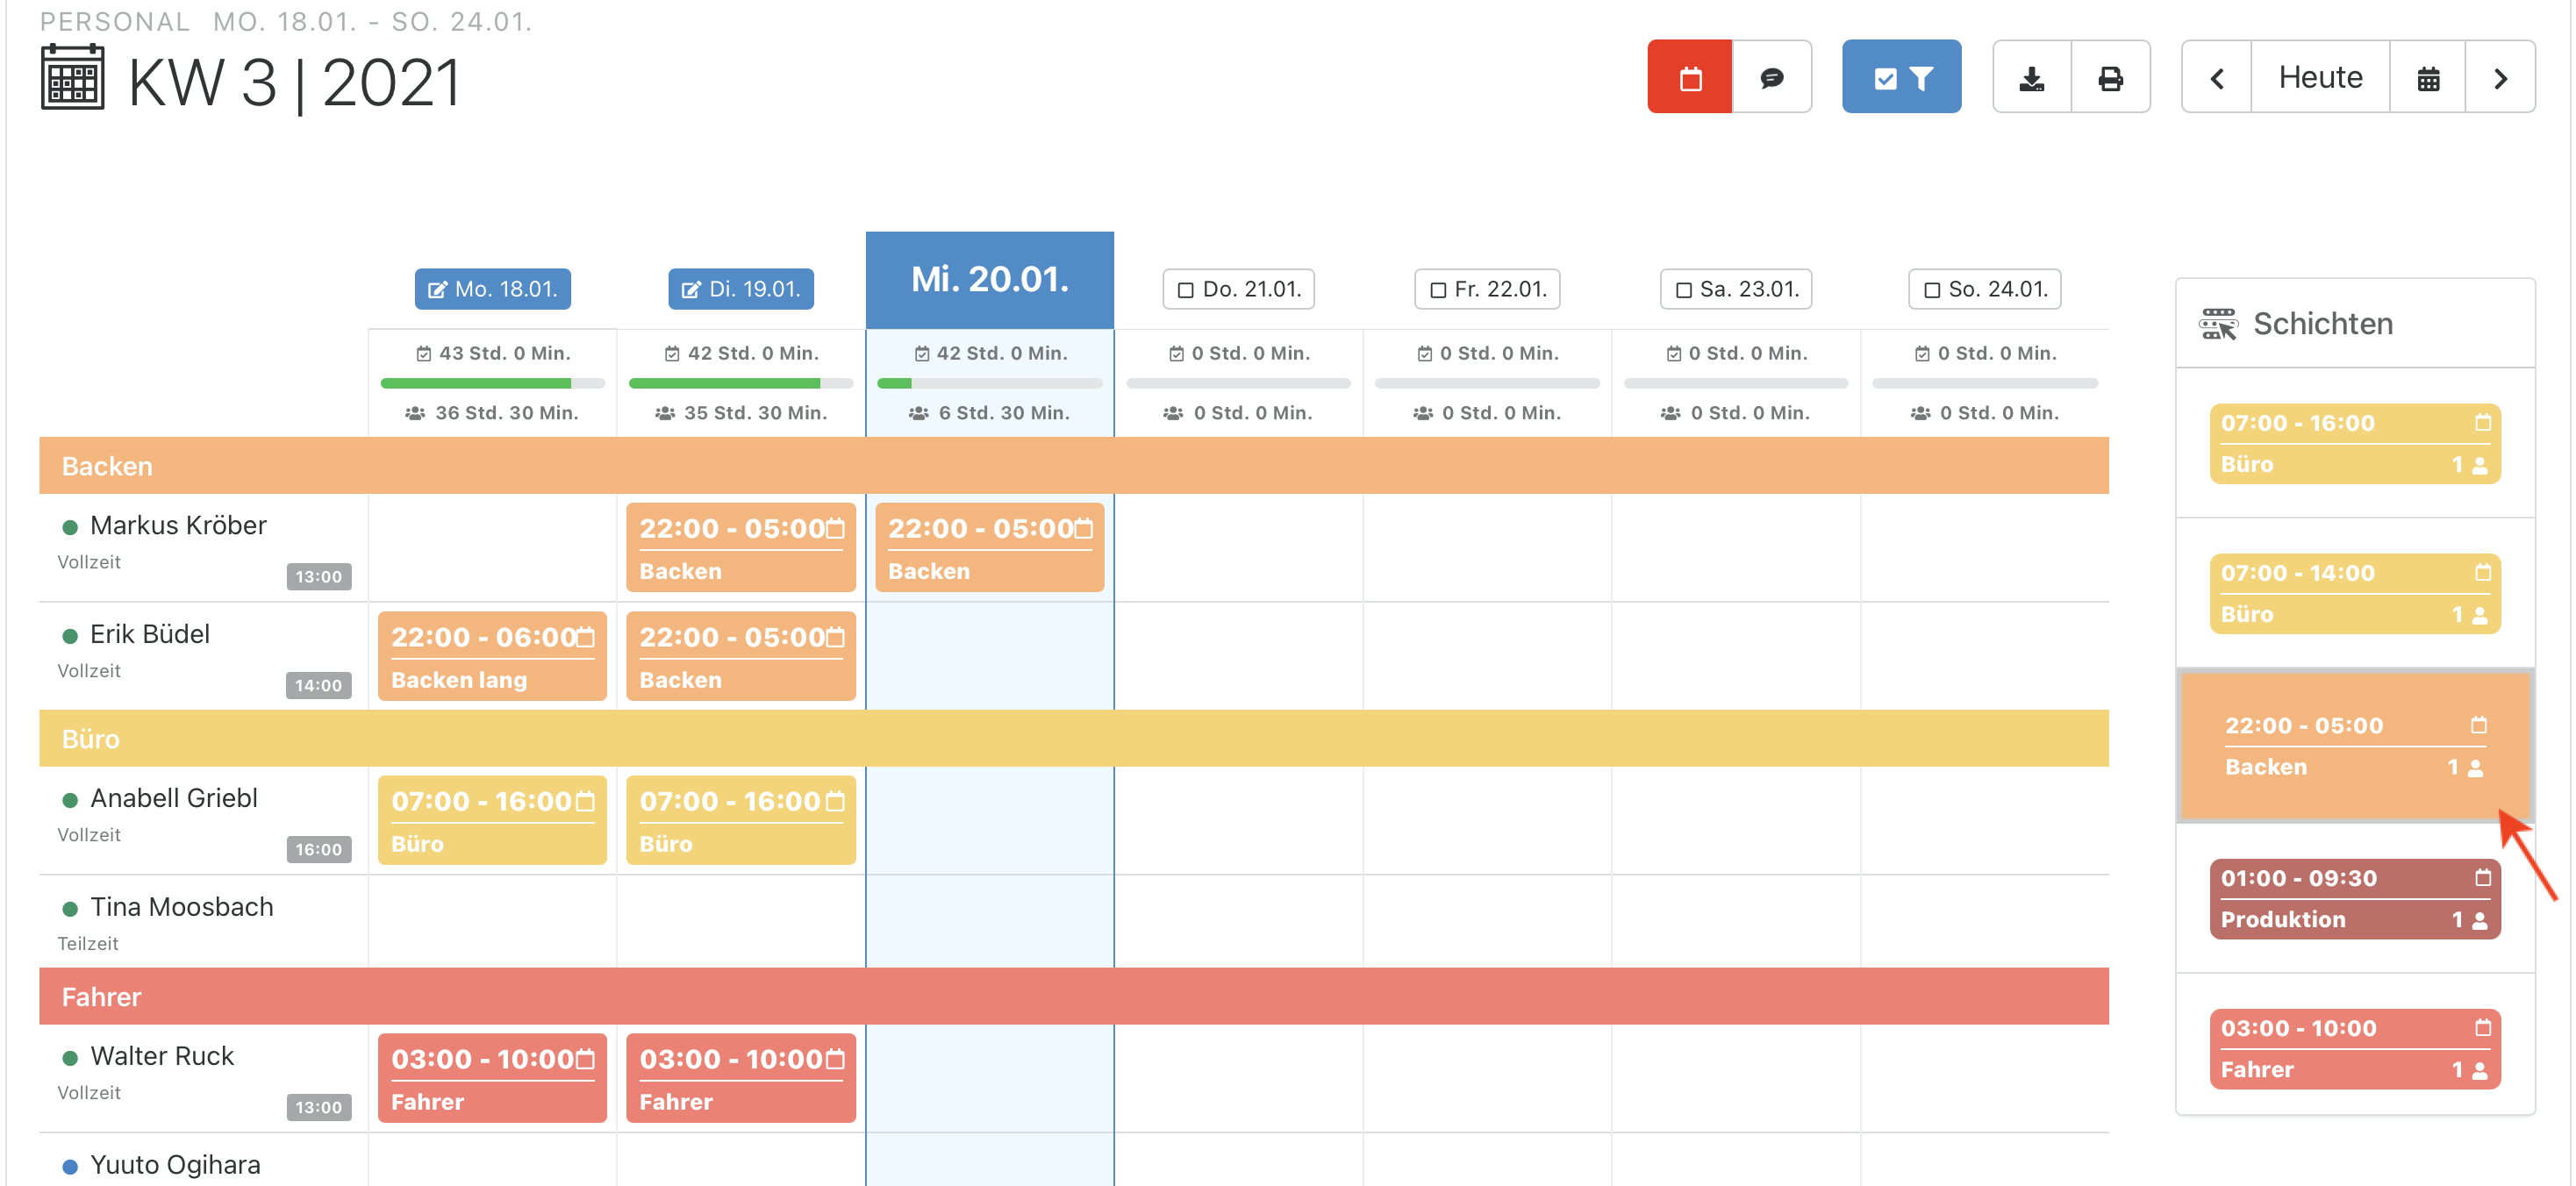
Select an open shift with a click. Now go to the day selection with the mouse. Here you can see the forecast and the planned figures for the respective employees and can distribute the shifts accordingly.
Once you have completed a day, select the next one. The date of the completed day is highlighted in white, days with open shifts in blue.
Have you assigned a shift incorrectly? Simply select it with a click. Once selected, you can assign the shift to another employee by clicking on it or remove it completely by clicking on the cross.
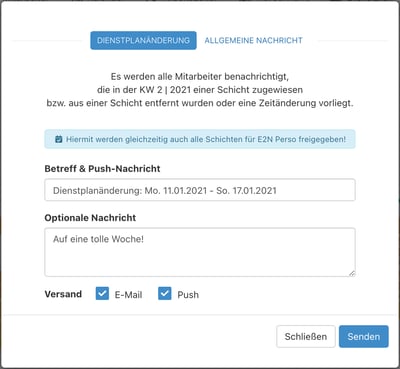
You inform your employees about the completed duty roster via a speech bubble. By notifying them by e-mail and/or push message, the duty roster is also immediately released in the staff access.
If you want to write your duty roster even faster in the future, it makes sense to work with duty roster templates. You create a template from the shift plan of a day via the burger menu.
3 The E2N way
In the future, you simply go the E2N way when scheduling:
-
Sales planning
-
Use appropriate layer templates
-
Assign employees